


Fireplaces played a central role during the 1950s and 1960s. They became an iconic feature, often positioned as the heart of the home’s living or family room. Architects and designers of the time made fireplaces stylish focal points within mid-century interior designs.
Common Fireplace Types
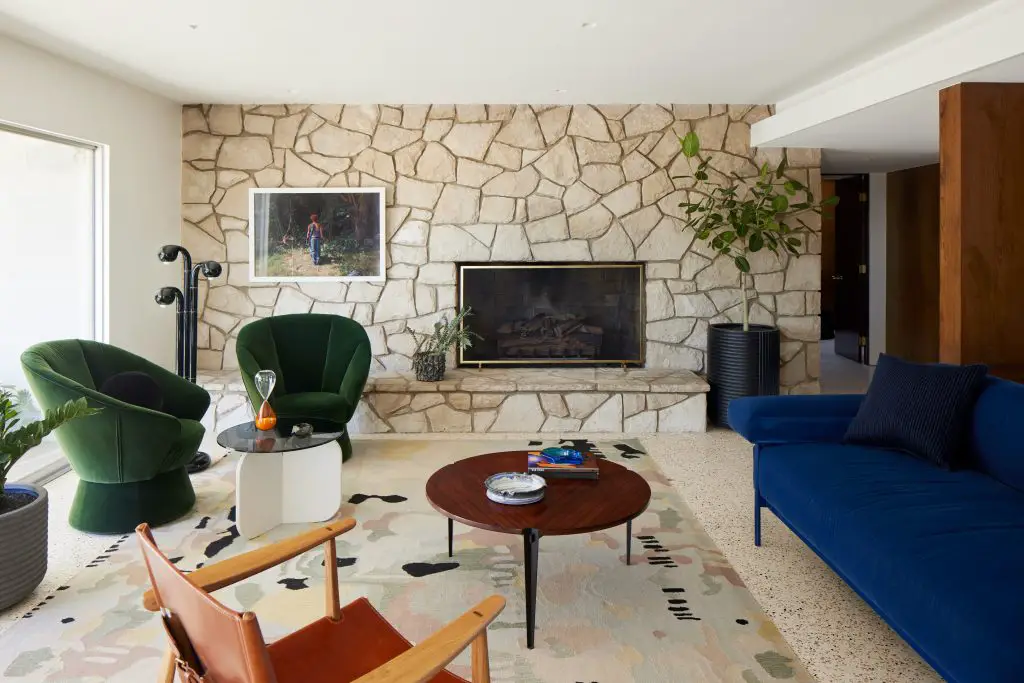
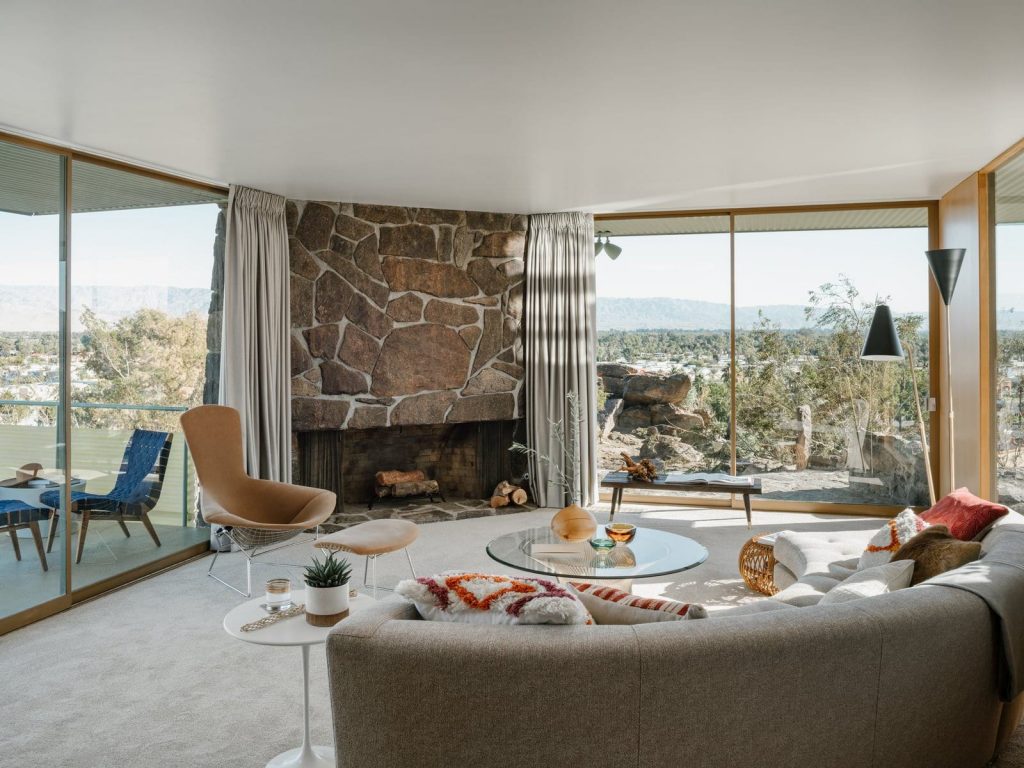
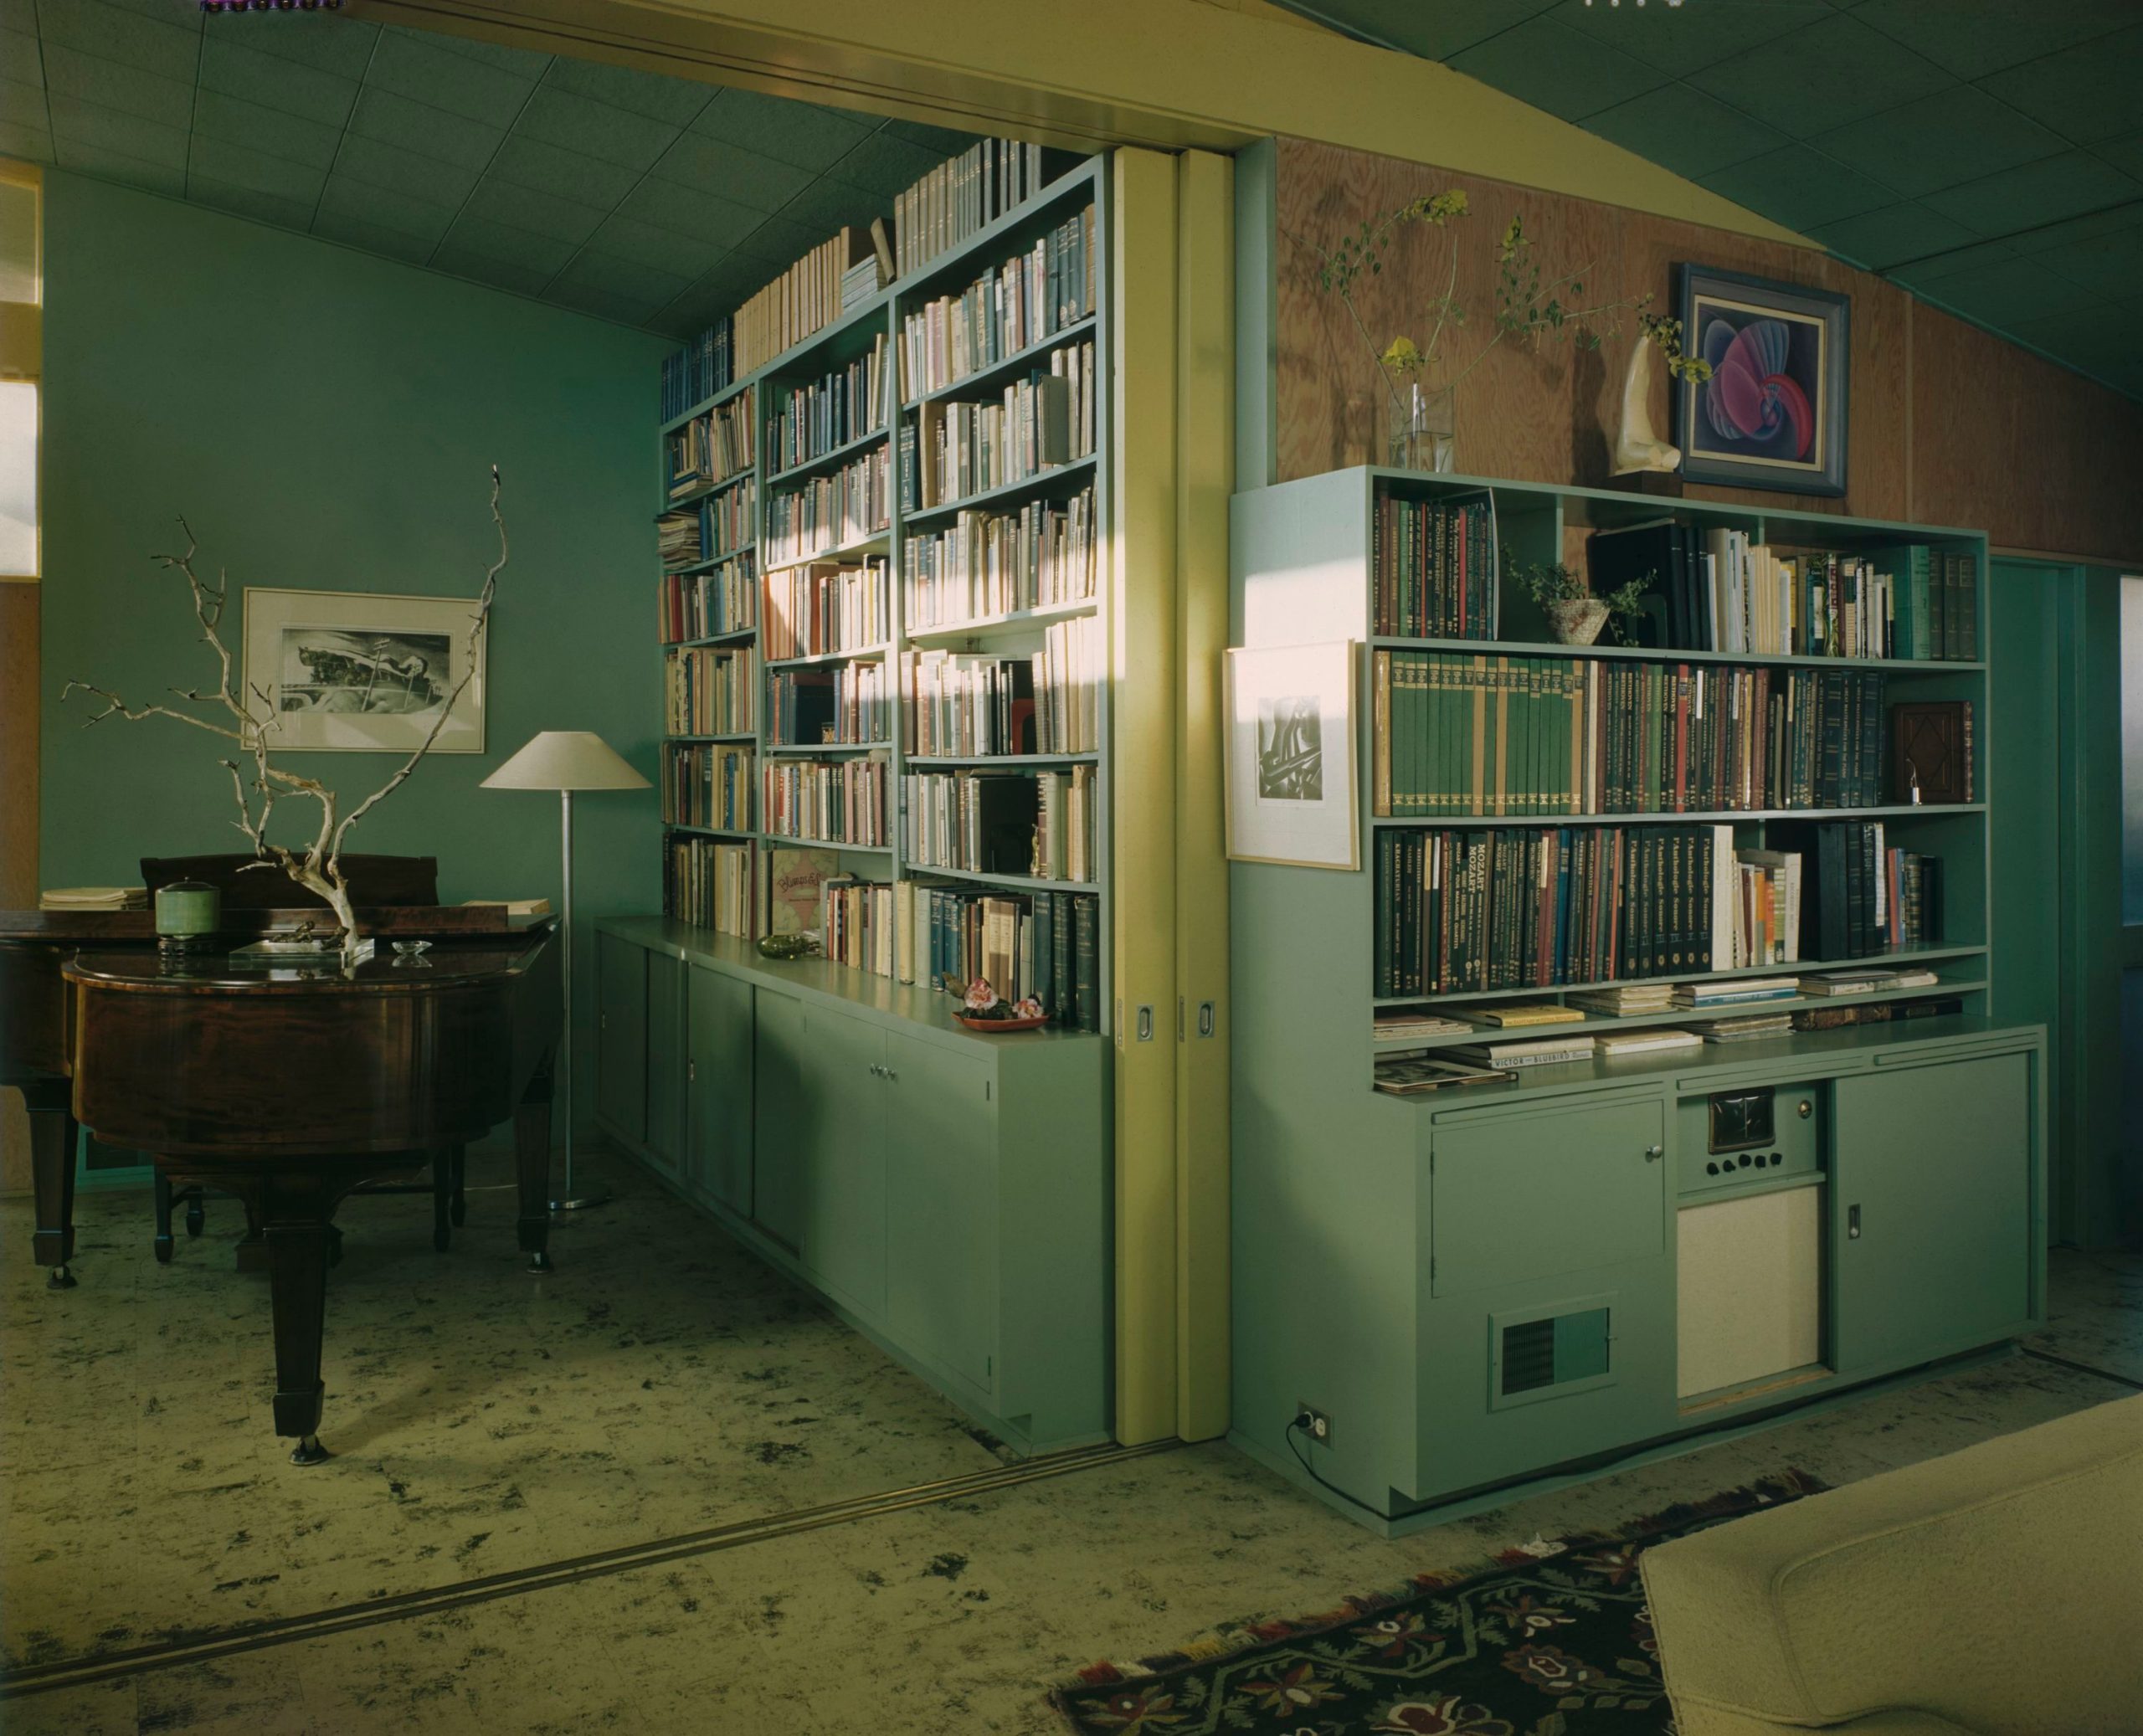
Several fireplace designs were prevalent during the mid-century period, each reflecting the era’s aesthetic preferences. Masonry fireplaces, often built from brick or stone, were particularly common and admired for their natural textures.
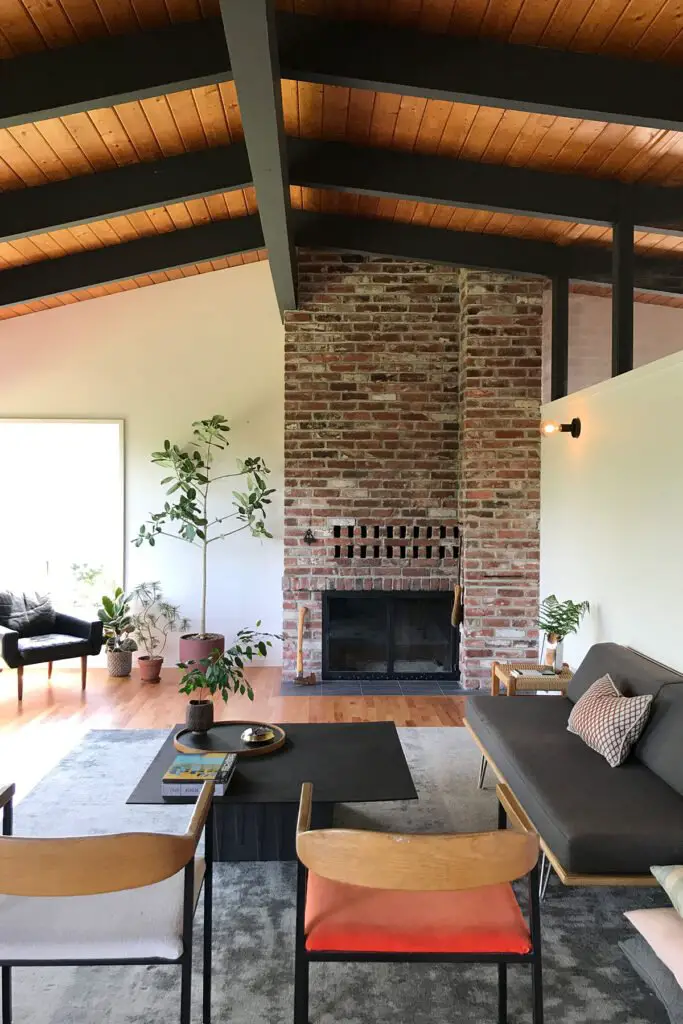
Brick fireplaces provided warmth and authenticity, with designs ranging from streamlined, linear shapes to more elaborate designs incorporating geometric patterns or decorative elements. Stone fireplaces, another mid-century staple, frequently featured flagstone or stacked stone designs, embodying a rustic charm that perfectly complemented the simplicity of mid-century décor.
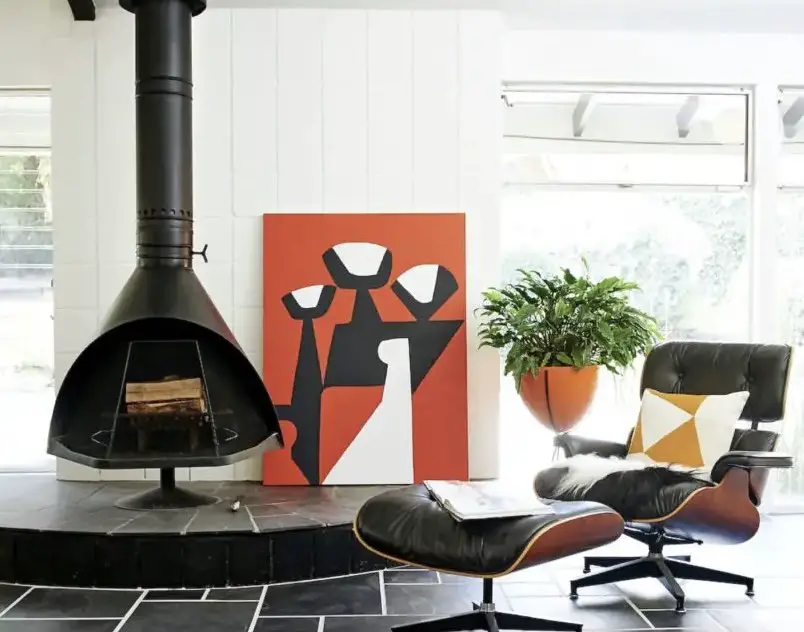
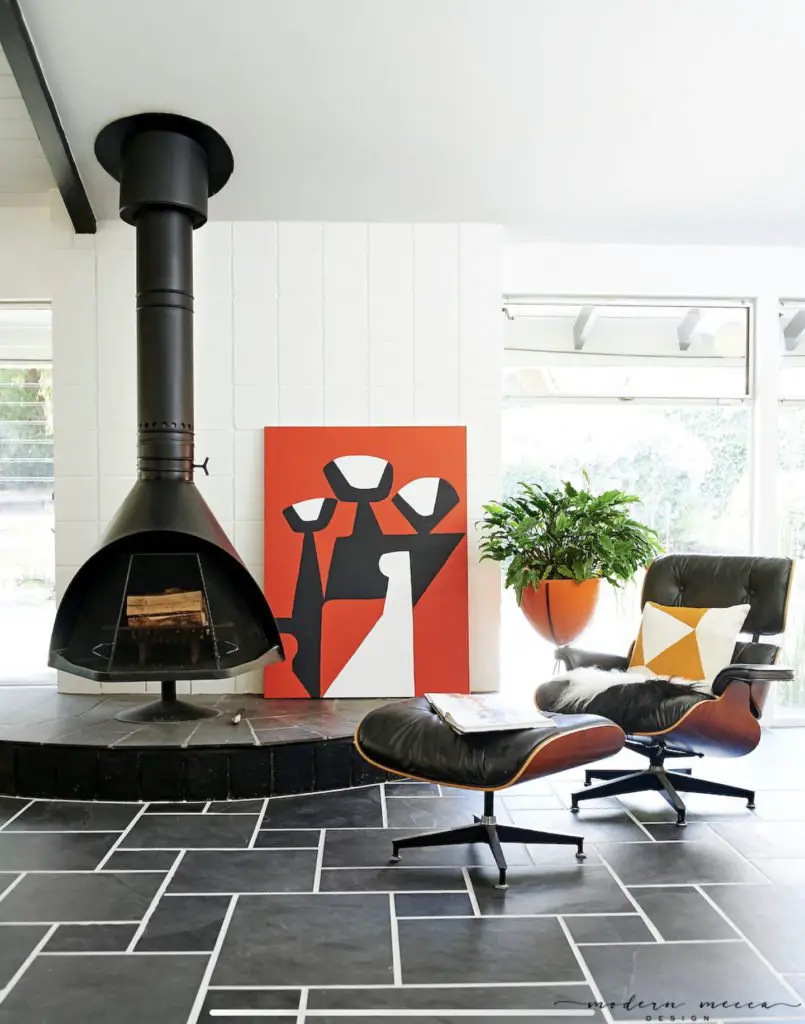
Metal fireplaces also rose in popularity, with prefabricated units often crafted from materials such as steel or copper. These fireplaces were notable for their sculptural qualities, often showcasing futuristic or space-age forms that became emblematic of the era. Freestanding metal fireplaces, sometimes referred to as “Malms,” became especially popular, offering flexibility in placement and a striking visual statement. Their sleek, conical shapes and vibrant enamel colors added modern flair and personality to interior spaces.
Design Features and Materials
Mid-century fireplace designs varied widely, from minimalist flush-mounted installations to dramatic floor-to-ceiling configurations. Cantilevered mantels and asymmetrical surrounds were all features typical of the period, highlighting innovative construction techniques and forward-thinking design sensibilities. Fireplace materials were chosen not just for durability but also for their aesthetic impact, with smooth plaster, richly colored ceramics, and natural wood frequently employed to create contrasting textures and visual interest.
Understanding this historical context shows why restoring or fixing fireplaces in mid-century homes needs careful attention. Just as important is keeping them in good shape over time. Here are some simple maintenance tips to help you do that.
Step-by-Step Restoration Guide
Tools and Materials Needed
- Dust mask or respirator
- Safety goggles
- Heavy-duty gloves
- Drop cloth
- Painter’s tape
- Sanding blocks or electric orbital sander
- Sandpaper (60-, 80-, and 120-grit)
- Wire brushes
- Vacuum cleaner with brush attachment
- Damp cloths
- Masonry repair mix
- Optional: chemical paint remover
Step 1: Assess and Prepare
Carefully inspect your fireplace to determine its condition. Check for damaged bricks or stones, loose mortar, or excessive paint layers. Decide whether you prefer removing paint entirely or repainting the surface.
Step 2: Gather Necessary Tools
Ensure you have all required materials, including safety equipment (dust mask, goggles, gloves), sandpaper (60-, 80-, and 120-grit), wire brushes, paint stripper (optional), drop cloth, vacuum, damp cloths, mortar repair mix, and a masonry sealer.
Step 3: Protect Your Space
Cover nearby furniture, flooring, and walls with drop cloths and secure them with painter’s tape to avoid dust and debris damage.
Step 4: Remove Old Paint
Start with coarse sandpaper (60-grit) or a chemical paint stripper, carefully removing the existing paint layer. Use a wire brush for stubborn areas or detailed textures. Work systematically and gently to avoid damaging the brick or stone surfaces.
Step 5: Refine the Surface
Switch to medium sandpaper (80-grit) to smooth out imperfections and residual paint. Maintain steady, even pressure, working carefully to ensure a consistent surface texture.
Step 6: Fine Sanding
Finish with fine sandpaper (120-grit), providing a smooth and even finish that prepares your fireplace for a new coat of paint, stain, or a clear protective seal.
Step 7: Repair Masonry Damage
After sanding, inspect closely for any damaged mortar or brick. Use a masonry repair mix to restore the mortar, carefully blending it to match the existing texture and color.
Step 8: Clean Thoroughly
Use a vacuum to remove dust and debris from every crevice, followed by a thorough cleaning with damp cloths. Allow the fireplace to dry completely, ideally overnight.
Step 9: Apply Protective Finish or Paint
Decide on the desired finish. Repaint using appropriate masonry paint, or apply a clear masonry sealer to protect the natural appearance of brick or stone. Whitewashing or limewashing techniques can also be employed for a vintage mid-century aesthetic.
Step 10: Final Inspection
Perform a detailed final inspection to ensure consistent coverage and no missed spots. Touch up as needed, ensuring your fireplace fully complements your mid-century home.
Lance Gerber
Maintenance Tips
- Regularly dust the fireplace to maintain cleanliness.
- Inspect annually for signs of damage, moisture, or discoloration.
- Reapply masonry sealant every few years to protect surfaces.
- Ensure adequate ventilation when the fireplace is in use to prevent smoke or soot buildup.
- Periodically clean the chimney to ensure optimal performance and safety.
Special Considerations for Stone Fireplaces
If your fireplace is made of stone instead of brick, the approach to removing paint needs to be more careful due to the stone’s irregular surfaces and natural porosity.
Start with a gentle cleaning. Before removing any paint, clean the stone surface using a mild soap and water solution. Use a soft brush—not a wire one—to avoid scratching or damaging the surface.
Assess the paint layer. Look at how many layers of paint have been applied and whether it’s peeling or firmly adhered. Always test your chosen method on a small, hidden area first.
Avoid aggressive sanding. Natural stone, especially softer types like limestone or sandstone, can be damaged easily. Mechanical sanders should be avoided unless you’re working with harder stone like granite.
Use a chemical paint stripper that is safe for masonry or stone. Stay away from strippers that contain methylene chloride. Citrus-based or alkaline gel removers are safer and work well with porous materials. Apply the stripper with a brush, allow it to dwell for the time specified by the manufacturer, and scrape gently using a plastic or wooden tool. Rinse thoroughly with water and a sponge or rag afterward.
If paint has soaked into the stone, use a poultice. Mix a masonry-safe solvent with an absorbent material like kaolin clay or flour to make a paste. Apply it to the surface, cover with plastic wrap, and leave it overnight. Scrape off the poultice and clean the area well.
Steam cleaning is another option. A low-pressure steam cleaner can help loosen paint in grooved or textured areas without damaging the stone.
After all paint is removed, rinse the entire surface with clean water. Let the fireplace dry completely—ideally for 24 to 48 hours—before applying any new finish or sealant.
In many mid-century homes, fieldstone, river rock, and flagstone were used in fireplace construction. These materials have distinct characteristics that are worth preserving. Work slowly and with care to maintain their original appearance.
Restoring your mid-century fireplace not only revitalizes your home’s character but ensures it remains a functional and attractive centerpiece for years to come.

Brock Beazley


